
Wednesday, October 31, 2018
Its fairing time
Monday, October 29, 2018
Inside wet out
All fun and games here in the shop today. A good 2+ hours wetting out the 6oz fabric on the inside of the hull. Nothing is ever easy, I used the last drop at the very end. Time to order more epoxy.
Tuesday, October 23, 2018
Inside out
 Its been awhile since the last post, but lets be frank here. Sanding is boorish, sanding is no fun, sanding looks the same on any photo and makes for pretty poor blogging. If you want to know, I did so much sanding on the inside of this project I had to take a few days off just to let my hands heal up a bit. But that is behind us now and am ready to move on to the interior fiberglass! I spread the cloth out this morning and will do the initial wet out sometime this week depending on temperatures. I need time to get the shop up to 70+ degrees to get a good flow and cure, then I let it cool off while the epoxy dries. This seems to compress any air bubbles and makes a tight layup.
 |
| Ready for epoxy |
Wednesday, October 03, 2018
Bottoms up

The bottom stripping is going well up to this point. I was using extra strips from a previous build and only have 3 left. I will have to mill a half dozen more to finish up.
Thursday, September 20, 2018
Centerline
This morning I managed to get a good looking center line installed on the 12 footer. I am at the point where I usually switch from placing strips on the outside in to the inside out. I kind of had a thought about doing a different pattern on the bottom, chevrons or diagonals or something.... have to see what happens.


Wednesday, September 19, 2018
Fill Coats Going Down

One project complete and the next one is underway. Fill coats on the unfinished are progressing nicely. Once it hardens then I can flip it over and start fairing the inside of the hull. You can see in the back ground another 12 footer is underway with the strips up to the waterline....
Wednesday, September 12, 2018
Test Run
Ok so I know these boats will float, how could they not? But given the opportunity to take one out for a test paddle is a no-brainier... so i took a 12 footer down to Lake Pelican and put it in the water. The wind was blowing off shore so the water looked calm. I had to stand on the painter line to keep the boat from being blown away as I snapped pictures like a fashion model....

I did paddle it for awhile, up and down the shoreline... it took a moment to get the feel of the boat and relaxed into the seat. There is a bit of rocker in the craft and using a single blade is a bit cumbersome. Using a double blade though really brings out the speed and maneuverability. Just a pleasure to paddle.

I did paddle it for awhile, up and down the shoreline... it took a moment to get the feel of the boat and relaxed into the seat. There is a bit of rocker in the craft and using a single blade is a bit cumbersome. Using a double blade though really brings out the speed and maneuverability. Just a pleasure to paddle.
Tuesday, September 11, 2018
Side Job
Can a side job have a side job? Ok, so every once in a while I have to do some fixing up around the castle grounds. In this instance an entry step that I built over 10 years ago, decide that enough was enough. It even had the rudeness to collapse while the boss lady was using it... so to keep the peace, 9 boards and a couple hours... tada!!


Friday, September 07, 2018
Fixing the cracks
This is an interesting project, there are a number of cracks and splits in the hull of this canoe. The boat was taken off its forms before fiber glassing and put in storage for quite awhile. The cedar has dried out a bit and some of the seams have split. Sooooo how do you fix something like this?

The problem is how to squeeze the parts together to get the glue to stick and dry... here is the clever part. Superglue! By gluing down a couple of scrap pieces on either side of the split.
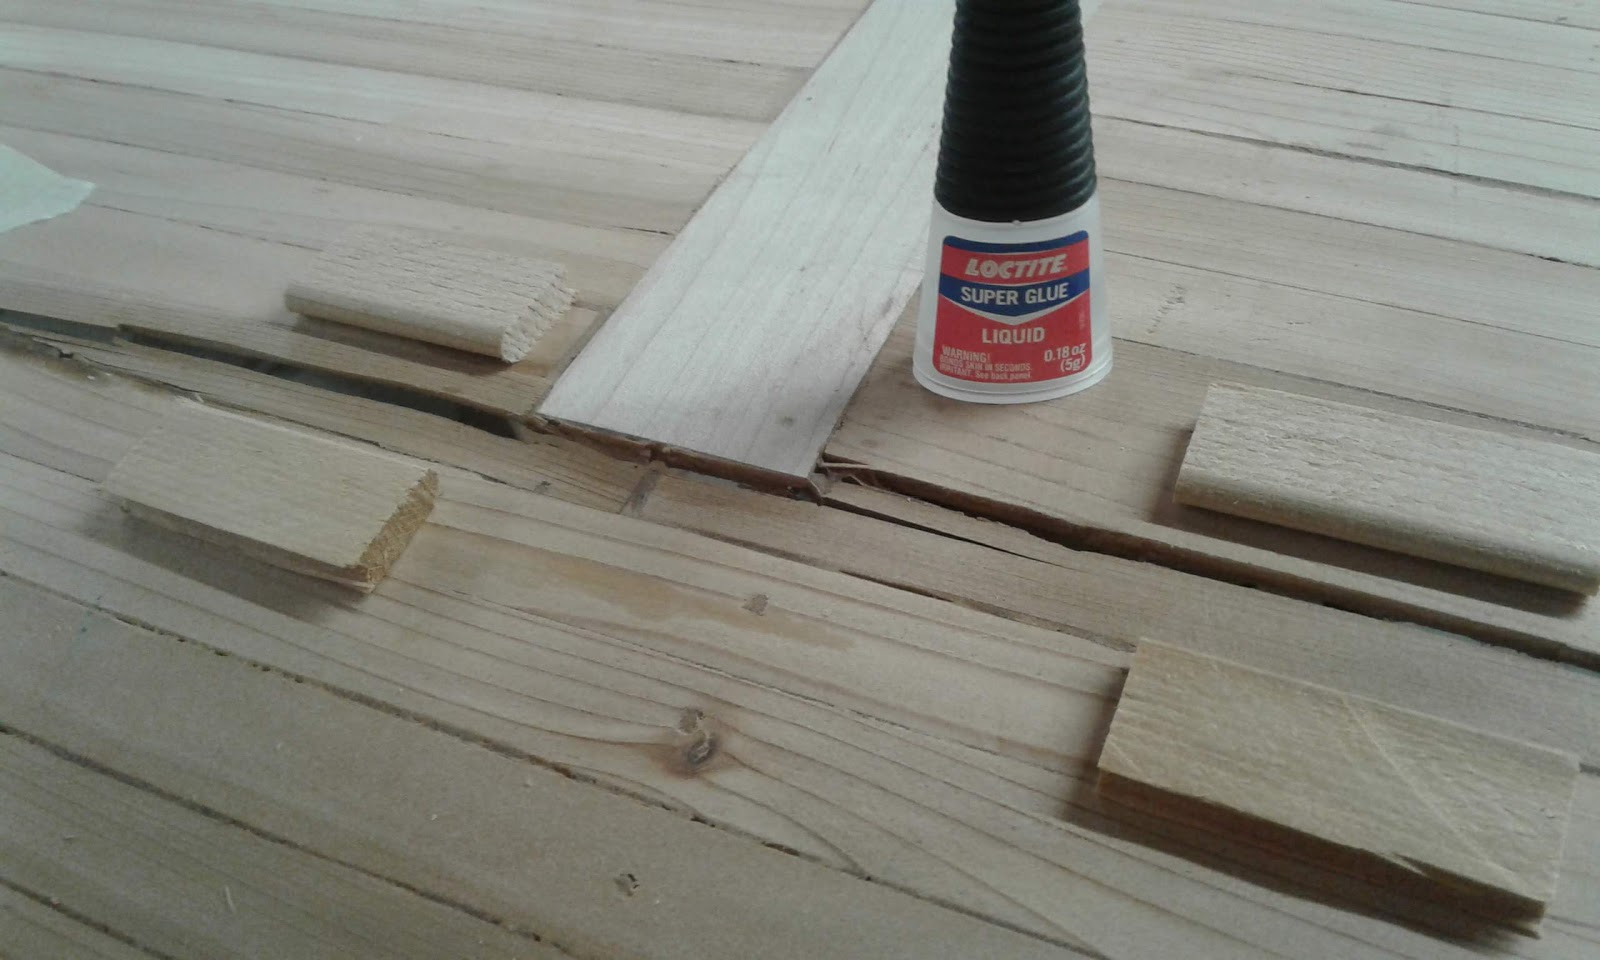
Once the glue is dry, I should be able to plane off the scraps and sand any blemishes out. So far so good, I'll keep you posted.

Wednesday, August 29, 2018
Another Begining
Take one out and start another one! Yes I do believe I have a problem... not enough space to build all of the canoes and kayaks I want.


So this build is going to be another 12' solo, narrow enough to use a double blade with a slatted chair instaid of the traditional seat. The different thing about this one is I am using scraps and leftover strips from the previous builds and will most likely paint the outside hull. Might even do some cool graphics on it as well.
Friday, August 24, 2018
Sunset over Pelican Lake

This is why we do it folks. A beautiful sunset over calm waters, the gentle breeze on your cheeks and the swish of a paddle making little swirls and dimples in the surface of the lake. A few bugs hum along and the birds sing their evening songs. The stress and tension of the day flow down through the paddle and into the water, a bottomless well that accepts those feelings with an indifference that calms and soothes.
Monday, August 20, 2018
Ready to roll
These two canoes are completely done and waiting for pickup. The other two for this order are so close to completion I can smell the varnish.

So here they stay until the others are ready to go... could be a week, could be less....

So here they stay until the others are ready to go... could be a week, could be less....
Thursday, August 16, 2018
Final Coat
Ready for the final coat of varnish on #2 and #3. After 3+ coats, a final hand sanding and there you are. Its pretty exciting to see the project come to the delivery stage..


Lights are installed on #2 and working great. I think this is going to be standard on all of the larger canoes that I build. I have a simple switch and battery pack installed on the rear bulkhead.

The glow of fresh varnish!
Wednesday, August 01, 2018
Gunnels
Worked on installing the gunnels on the first of the twins. It went well this morning but some times I swear I need four extra fingers on one extra hand.

I am going to sneak this one down to the lake and try to determine the seat placement and center of gravity.

I am going to sneak this one down to the lake and try to determine the seat placement and center of gravity.
Tuesday, July 31, 2018
Unfinished
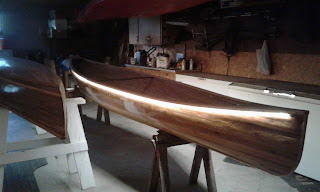
I was approached a couple months ago about a project that was never completed. This person's father started this canoe project some time ago, I'm not sure of the time line, but he passed away before he could finish it. When his children settled the estate they set aside some funds to finish the project so that they can enjoy this floating final memory of their father.

As you can see from the photos, things are a bit rough but I am certain that we can make this boat shine like it was intended to. A few rookie mistakes were made but nothing that is not possible to smooth out and make solid. Fiberglass solves a lot of issues...

I will have to create some forms to bring the hull back into shape, then maple gunnels, black walnut seats and thwarts and decks should make this project outstanding.

Tuesday, July 24, 2018
Canoe Seats Complete
If you are not into kneeling in a canoe then you need a place to sit. With me being hard pressed for time and wanting to finish the twins as soon as possible, I asked my neighbor to whip up a couple of seats for the twins. Because these are solo double bladed canoes what better way to paddle leisurely than with this?


Wednesday, July 11, 2018
Pointeee ends..
I used a method called stemless construction to build the twins. It saved me a little time and effort and has an attractive look as the strips interlock on each end. However, what to do with the pointy ends? They are extremely difficult to push fiberglass into without making a huge mess...


So I decided to do and end pour. Basically a cup of epoxy poured into the ends to hold it solid and give me a nice end to tuck the fiberglass into, also a solid block to drill through if I decide to connect a line through the end. Epoxy gets hot as it cures, and I was a little concerned about the wood, but it cooled off before spontaneous combustion could occur.


So I decided to do and end pour. Basically a cup of epoxy poured into the ends to hold it solid and give me a nice end to tuck the fiberglass into, also a solid block to drill through if I decide to connect a line through the end. Epoxy gets hot as it cures, and I was a little concerned about the wood, but it cooled off before spontaneous combustion could occur.
Monday, July 02, 2018
Inside Fairing
An hour..... one whole hour... that is how much time I spent with the 60 grit paper in my orbital sander to fair out and smooth one half of this canoe... I am starting to wonder just how many hours I can put on the RA sander before it goes into critical melt down....

On other projects..... this is the first attempt to make a caring yoke for canoe #2. Cut from a black walnut stump I had laying around.


On other projects..... this is the first attempt to make a caring yoke for canoe #2. Cut from a black walnut stump I had laying around.

Thursday, June 28, 2018
Inside out
Yesterday we flipped the canoes and removed the forms from the inside... I am VERY happy at how the epoxy flattened out and the how little sanding I will have to do to the outside. Today I trimmed off the excess fiberglass and made the first pass with a paint scrapper on the inside. This helps to take out the glue drips, splinters and starts the fairing process. Right now I would estimate that the hulls weigh no more than 20 lbs...


Things are good enough that I think I can jump right in with 60 grit paper on my random orbital and give these babies the smooth..... another day of sanding.... oh well.....

Things are good enough that I think I can jump right in with 60 grit paper on my random orbital and give these babies the smooth..... another day of sanding.... oh well.....
Monday, June 25, 2018
Fiberglass and epoxy
Sanding is finally done and its time to move on to fiberglass and epoxy. You can see by the mat finish that the glass is in place and the first coat of epoxy has wet out the glass. With the two canoes it was about a 6 hour process from start to finish.


Next comes two fill coats of epoxy that, as it says, fills the weave of the glass and buries it a bit so that we can sand and smooth before the final varnish goes on.

Now its starting to look pretty shinny.... but we are not done yet! One more fill coat to go then we can flip them over, pull out the forms and start this process again.
Subscribe to:
Posts (Atom)